💡 TL;DR:
- Plan thoroughly to avoid costly mistakes and ensure a long-lasting shower.
- Cutting corners on materials or labor risks water damage and expensive repairs.
- Proper waterproofing and substrate prep are non-negotiable for a leak-free shower.
- Budget primarily for foundational elements; finishing touches come second.
- Hire qualified professionals for tile, plumbing, and waterproofing work.
- Avoid mid-project design changes to prevent delays and extra costs.
- Ensure correct drainage, slope, and ventilation to prevent mold and standing water.
- Maintain your shower with regular cleaning, sealing, and inspections.
- Spot early warning signs like dark grout, musty odors, or water stains to save thousands.
- Investing in quality materials, skilled pros, and proper maintenance maximizes comfort, safety, and home value.
Why Shower Remodels Can Go Wrong
After years in the bathroom renovation industry, I’ve seen countless shower remodel projects go from dream to nightmare faster than water down a drain. Planning a shower remodel might seem straightforward, but without proper guidance, homeowners often make costly mistakes that could have been easily avoided. These errors not only drain your wallet but can lead to significant structural issues, mold problems, and endless frustration.
I’ve witnessed the disappointment on homeowners’ faces when they realize their beautiful new shower has improper waterproofing or their expensive tile is cracking after just months of use. These situations are preventable with the right knowledge and planning.
In this comprehensive guide, I’ll walk you through the most common and expensive mistakes I see in shower remodels and provide practical solutions to help you avoid them. Whether you’re planning a DIY renovation or hiring professionals, these insights will save you time, money, and the headache of dealing with repairs down the road.
The True Cost of Cutting Corners in Shower Remodeling
When it comes to shower remodeling, cutting corners might seem like a smart way to save money initially. However, I’ve repeatedly seen how these “savings” transform into significant expenses later on.
The bathroom endures more moisture and temperature fluctuations than almost any other room in your home. These conditions demand proper materials and installation techniques. Skimping on quality here isn’t just a cosmetic concern—it’s a recipe for structural damage.
For example, choosing a standard drywall instead of cement board might save you $100 now, but when moisture inevitably seeps through your grout and warps that drywall, you’re looking at a complete tear-out that could cost thousands. The same goes for opting for the cheapest contractor without checking credentials or skipping crucial waterproofing steps.
The Hidden Expenses of Poor Planning
Poor planning accounts for about 80% of the costly mistakes I see in shower remodels. Many homeowners jump straight to selecting beautiful fixtures and tiles without considering the foundational elements that keep a shower functional for decades.
When you don’t properly plan for drainage slopes, waterproofing systems, or plumbing adjustments, you’re setting yourself up for expensive corrections later. Moving a plumbing line after tile installation, for instance, can cost five times more than doing it during the initial construction phase.
Furthermore, inadequate waterproofing is the leading cause of bathroom renovations failing prematurely. Water damage doesn’t just affect your shower—it can compromise the structural integrity of surrounding walls, floors, and even ceilings below.
Planning Phase: Setting Yourself Up for Success
Creating a Realistic Budget (That Includes Contingencies)
The first step to a successful shower remodel is establishing a realistic budget. I always advise my clients to account for the visible elements (tile, fixtures, glass) as well as the crucial behind-the-scenes components (waterproofing membranes, proper substrates, quality plumbing).
A good rule of thumb is to allocate 60-70% of your budget to materials and labor for the foundational elements. The remaining 30-40% can go toward the finishing touches that make your shower beautiful.
Always include a 15-20% contingency fund in your budget. In my experience, even the best-planned remodels encounter unexpected issues once walls or floors are opened up. Having this financial buffer prevents compromising on quality when surprises occur.
Thorough Planning and Design Considerations
Before demolishing your existing shower, have a complete plan in place. This includes exact measurements, material selections, and a clear understanding of the construction sequence.
I recommend creating a detailed shower design that addresses:
- Shower size and layout
- Waterproofing system specifications
- Drainage solutions (linear or center drain)
- Niche locations and sizes
- Bench placement (if applicable)
- Lighting considerations
- Ventilation requirements
A well-thought-out design prevents mid-project changes, which are among the most expensive mistakes in remodeling. Every time you change your mind after materials are ordered or work has begun, you incur additional costs and extend the project timeline.
Permits and Building Codes: Don’t Skip This Step
I’ve seen beautiful shower installations torn out because homeowners or contractors skipped the permit process. Building codes exist for your safety, and ignoring them can lead to significant expenses down the road.
Most shower remodels that involve plumbing changes, electrical updates, or moving walls require permits. Working without them might seem like a money-saver, but consider the consequences: insurance companies can deny claims for damage caused by non-permitted work, and unpermitted renovations can complicate your home’s sale.
Additionally, building inspectors can require you to tear out completed work if it doesn’t meet code requirements. This is particularly common with improper shower waterproofing, inadequate electrical protection, and insufficient ventilation—all crucial safety elements in bathroom renovations.
Material Selection: Quality Matters More Than You Think
Understanding Waterproofing Options and Why They’re Non-Negotiable
The most critical component of your shower isn’t what you see—it’s what lies beneath. Proper waterproofing is absolutely essential to prevent moisture from damaging your home’s structure.
Traditional waterproofing methods like hot mop or shower pan liners are being replaced by modern systems like liquid waterproofing membranes and sheet membranes. These newer systems create a more reliable moisture barrier when installed correctly.
I always recommend using a complete waterproofing system rather than mixing products from different manufacturers. Complete systems are tested to work together and often come with better warranties. The small additional cost upfront can save thousands in potential water damage repairs.
Tile Selection: Balancing Aesthetics with Practicality
The perfect shower tile balances beauty, durability, and safety. I’ve seen homeowners select gorgeous polished marble for shower floors, only to create a slipping hazard that requires replacement shortly after installation.
For shower floors, choose tiles with sufficient slip resistance. Porcelain tiles with a textured finish or small mosaics with multiple grout lines provide better traction when wet. Save the larger format or polished tiles for walls where slip resistance isn’t a concern.
Consider maintenance requirements too. Natural stone tiles require regular sealing to prevent staining and water absorption. Porcelain tiles, while initially more expensive than ceramic, offer superior water resistance and durability that pays off over time.
Fixtures and Hardware: Where to Splurge and Where to Save
Quality shower fixtures directly impact your daily experience and the longevity of your renovation. I advise splurging on:
- Shower valves (hidden behind the wall and expensive to replace)
- Showerheads (affect water pressure and experience)
- Heavy-duty glass hardware (prevents door sagging)
Areas where you can consider more budget-friendly options include:
- Decorative trim pieces
- Some accessory items like soap dishes or towel bars
- Non-load-bearing shower niches
Remember that the fixtures you select must be compatible with your existing plumbing. Changing from a standard shower valve to a thermostatic system, for instance, might require additional plumbing work that increases your budget.
Hiring the Right Professionals: The Decision That Makes or Breaks Your Project
Vetting Contractors: Questions to Ask and Red Flags to Watch For
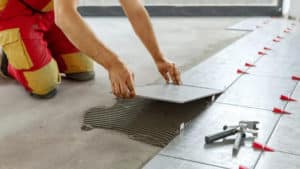
Choosing the right contractor is possibly the most crucial decision in your shower remodel journey. I recommend interviewing at least three qualified professionals before making your decision.
Key questions to ask potential contractors include:
- Are you licensed, insured, and bonded specifically for bathroom renovations?
- What waterproofing systems do you use, and why?
- Can you provide references for shower remodels completed more than two years ago?
- How do you handle unexpected issues that arise during construction?
- What is your process for obtaining permits and scheduling inspections?
Red flags to watch for include contractors who:
- Offer significantly lower bids than competitors (often a sign of cutting corners)
- Cannot provide proof of insurance or references
- Pressure you to make quick decisions
- Require large upfront payments before work begins
- Are vague about the specific waterproofing methods they’ll use
Understanding Quotes and Contracts: What Should Be Included
A detailed contract protects both you and your contractor. At minimum, your shower remodel contract should include:
- Specific materials with brand names and model numbers
- Detailed scope of work with clear descriptions of each phase
- Payment schedule tied to completion of specific milestones
- Warranty information for both labor and materials
- Timeline with start and estimated completion dates
- Process for handling change orders and additional costs
Be wary of contracts with vague language like “install shower” without specifics. This leaves too much room for interpretation and potential disagreements later.
The Importance of Specialized Skills for Shower Installation
Not all contractors have specific expertise in shower installations, which require specialized knowledge of waterproofing, substrate preparation, and tile installation. A contractor might be excellent at general remodeling but lack the specific skills needed for a watertight shower.
For best results, look for contractors who:
- Specialize in bathroom renovations specifically
- Have certifications from organizations like the National Tile Contractors Association
- Can demonstrate knowledge of current waterproofing systems
- Understand proper shower pan construction and slopes
Remember that the lowest bid rarely results in the best shower. Specialized knowledge commands higher rates but typically delivers superior long-term results.
Common Design Mistakes That Lead to Functional Problems
Size and Layout Errors That Create Daily Frustrations
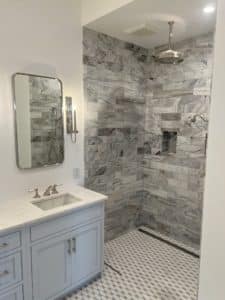
I’ve seen beautiful showers that were practically unusable because of poor layout decisions. Common mistakes include:
- Showers too small for comfortable movement (minimum 36″ x 36″, but 42″ x 42″ is more comfortable)
- Doors that hit toilets or vanities when opened
- Controls placed where you get splashed with cold water when turning on the shower
- Insufficient space between fixtures
Before finalizing your design, I recommend testing the layout by simulating movements in the space. Mark the floor with tape to visualize shower dimensions and door swings. This simple step can prevent frustrating daily experiences with your new shower.
Improper Drainage Solutions and Their Consequences
Shower drainage problems create immediate discomfort and long-term damage. The shower floor must have a minimum 1/4″ per foot slope toward the drain to prevent standing water.
Linear drains, while trendy and attractive, require more precise installation with a single-plane slope. Traditional center drains need a four-directional slope that’s easier to achieve but may limit your tile options.
Additionally, the drain capacity must match your shower system’s output. A rainfall shower head paired with body sprays can deliver up to 12 gallons per minute—far more than a standard 2″ drain can handle efficiently.
Ventilation Oversights That Lead to Mold and Damage
Inadequate ventilation is one of the most overlooked aspects of bathroom design. Even the best waterproofing can’t prevent mold and mildew if moisture can’t escape the space.
Your bathroom fan should be rated for the size of your bathroom (measured in cubic feet per minute or CFM). For most bathrooms, you’ll need a minimum of 50 CFM, but larger spaces require proportionally larger fans.
The fan should be installed near the shower and vented directly outside—not into an attic or another room. Timer switches or humidity sensors provide the best protection by ensuring the fan runs long enough to remove moisture after you’ve left the bathroom.
DIY vs. Professional: When to Call in the Experts
Tasks Homeowners Can Successfully Handle (And Those They Shouldn’t)
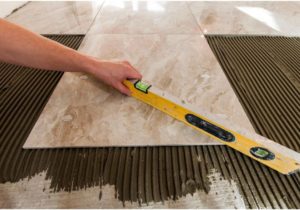
While DIY shower remodeling videos make the process look simple, the reality is far more complex. Based on my experience, here’s what homeowners can typically manage:
Suitable for DIY:
- Demolition (with proper safety precautions)
- Simple fixture replacement within the same footprint
- Painting and some decorative elements
- Installing accessories like towel bars and hooks
Tasks better left to professionals:
- Waterproofing installation
- Shower pan construction
- Tile setting on shower floors and walls
- Plumbing modifications
- Custom glass enclosure installation
The waterproofing and substrate preparation phases are particularly critical. These hidden elements determine whether your shower will last 2 years or 20 years.
The True Costs of DIY Mistakes
When DIY shower projects fail, the repair costs typically far exceed what professional installation would have cost initially. Common DIY failures include:
- Improper waterproofing leading to water damage in walls and floors
- Incorrect slopes causing standing water and mold growth
- Inadequate substrate preparation resulting in cracked tiles
- Plumbing errors causing leaks inside walls
When to Definitely Hire Professionals
Certain situations always warrant professional installation:
- Custom showers with multiple water features
- Curbless (zero-entry) shower designs
- Natural stone tile installations
- Projects requiring plumbing relocation
- Homes built before 1980 (potential asbestos or lead concerns)
- Any project where water damage would affect living spaces below
Remember that a quality shower installation is an investment in your home’s value and your daily comfort. Professional installation provides peace of mind through warranties and accountability that DIY projects simply cannot offer.
Installation Phase: Critical Checkpoints to Monitor
Key Inspection Points During Your Shower Installation
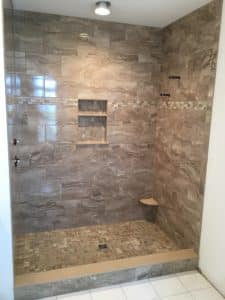
Whether you hire professionals or tackle some tasks yourself, knowing these critical checkpoints can prevent costly mistakes:
- Proper substrate installation (cement board or appropriate backer board, not drywall)
- Complete waterproofing application with special attention to seams and penetrations
- Correct pre-slope under the waterproofing membrane
- Proper drain installation with weep holes unobstructed
- Final slope of the shower floor (1/4″ per foot minimum)
- Complete coverage of thinset behind tiles (spot-check by removing an occasional tile during installation)
- Appropriate grout application and complete coverage
Don’t hesitate to ask your contractor questions during these stages. A quality professional welcomes your interest and will explain these crucial steps.
The Waterproofing Test: Non-Negotiable Step
Before any tile is installed, the waterproofed shower should undergo a flood test. This involves plugging the drain, filling the shower area with water, and checking for leaks over 24-48 hours.
This test adds a day or two to your project timeline but provides crucial verification that the waterproofing system functions properly. If leaks are discovered, they can be addressed before tile installation makes repairs exponentially more expensive.
I’ve never regretted performing a flood test, but I’ve often seen others regret skipping this step when leaks appear months after project completion.
Ensuring Proper Sealing and Finishing Details
The final steps of your shower installation are crucial for long-term performance. Pay special attention to:
- Silicone caulking at all changes of plane (wall to floor, wall to wall)
- Proper sealing around fixture penetrations
- Complete sealing of natural stone tiles before grouting
- Correct installation of shower door sweeps and seals
These seemingly small details make the difference between a shower that stays watertight for years and one that develops problems within months. A quality contractor will have a detailed checklist for these finishing elements.
Maintenance: Protecting Your Investment
Proper Cleaning Routines to Extend Shower Life
The right cleaning routine prolongs the life of your new shower and prevents expensive repairs. I recommend:
- Using a squeegee after each shower to remove excess water from glass and walls
- Wiping down wet areas with a microfiber cloth to prevent mineral buildup
- Using pH-neutral cleaners specifically designed for tile and stone
- Avoiding acidic cleaners (including vinegar) on natural stone and some grouts
- Running the exhaust fan during and for 30 minutes after showering
These simple habits prevent the most common causes of premature shower deterioration: soap scum buildup, hard water deposits, and mold growth.
When and How to Re-seal Grout and Natural Stone
Grout and natural stone are porous materials that require regular maintenance to prevent water penetration. As a general guideline:
- Cement-based grout should be sealed every 6-12 months
- Natural stone requires sealing every 6-18 months depending on the specific stone
- Epoxy grout doesn’t require sealing but benefits from regular cleaning
- Areas with hard water may require more frequent maintenance
The sealing process is relatively simple and inexpensive—typically about $50 in materials and a few hours of time—but prevents thousands in potential water damage repairs.
Signs That Indicate Potential Problems
Early intervention can prevent small shower issues from becoming major renovations. Watch for these warning signs:
- Grout that remains dark or wet long after showering (indicates water absorption)
- Efflorescence (white powdery substance) on grout or tile (suggests water moving through materials)
- Musty odors that persist despite cleaning
- Soft or discolored drywall surrounding the shower area
- Peeling paint or wallpaper near the bathroom
- Water stains on ceilings below the bathroom
If you notice any of these signs, don’t wait to investigate. Small repairs addressed promptly typically cost a fraction of what extensive water damage restoration will require.
Creating a Shower That Lasts
Avoiding costly mistakes in your shower remodel comes down to proper planning, quality materials, expert installation, and regular maintenance. The investment in doing things right the first time pays dividends through years of trouble-free use and the avoidance of expensive repairs.
I’ve guided hundreds of homeowners through successful shower renovations, and the most satisfied clients are invariably those who prioritized quality over cutting corners. They understood that a shower is more than just a place to get clean—it’s a complex system that protects your home while providing daily comfort.
Whether you’re planning a simple shower update or a complete bathroom transformation, the principles remain the same: invest in proper waterproofing, hire qualified professionals, use quality materials suitable for wet environments, and maintain your new shower regularly.
By avoiding the costly mistakes outlined in this guide, you’ll enjoy a beautiful, functional shower that enhances your home’s value and your daily routine for many years to come. Ready to get started on your dream shower remodel? Contact us today to schedule a consultation and make your vision a reality!

