Although tiling is an expert job that takes some preparation, we can help you by providing a guide to installation in Parsonsburg, MD so you can achieve the best finish. Whether you’re tiling a shower floor, a kitchen splashback, a full bathroom, or any other small space that calls on your expertise, like a fireplace, we’re here to provide you with the greatest tile tips and information to help you get a fantastic finish.
Ultimate Guide To Tile Installation
Installing tile results in a stunning, long-lasting, and easily cleaned floor. With a little planning and patience, tile installation may be a major task. Let’s get started and discover the ultimate guide to tile installation.
Step #1: Choose The Appropriate Material
One of the most often utilized materials in home remodeling is tile. Its popularity has really increased over the past several years, becoming a highly desirable material in every room of the house because of its potential for financial savings and its capacity to revitalize a space with its exquisite colors, patterns like metro tiles, or textures. If you’re learning how to install ceramic tile, selecting the right material is the first step toward a flawless finish.
With so many various materials available, each with pros and cons of their own, choosing the kind of tile you want may frequently be challenging. It’s crucial to consider the location of your tiles as well. If you intend to tile your kitchen or hallway, you will need a material that is long-lasting because these are high-traffic areas. This will also help you select the best tile materials for home projects.
Step #2: Cut Ceramic Tiles Appropriately
Depending on the material you need to cut, you will need to use either an electric or manual tile cutter while cutting your tiles.
Standard ceramic and porcelain tiles are usually cut by hand using cutters. Natural stone and more extreme tiles, such as 20mm porcelain, are cut with power cutters.
Step #3: Get The Surface Ready
Make sure the surfaces are dry, clean, and flat. This step helps ensure your tile finishes come out perfect.
First, remove the wallpaper to reveal the plaster if you’re switching it out for tile. Don’t forget to apply primer after using an appropriate filler to patch any holes or cracks you discover. You are prepared to begin tiling as soon as this is dry!
Step #4: Mix The Adhesive
The easiest way to mix your adhesive is to follow the directions that the manufacturer placed on the packaging. Adhesive comes in a wide variety of forms and brands, and each one has various guidelines and specifications for getting the ideal consistency. Continue mixing your adhesive until it has a thick consistency, like peanut butter.
The mixture should be sufficiently thick to apply to the wall without dripping. While remaining sufficiently practical to allow for some manipulation of the tiles once they are mounted on the wall.
Step #5: Apply The Adhesive
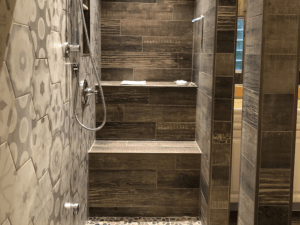
It is imperative that the adhesive be applied with a minimum of 85% total coverage underneath tiles in dry areas – like fireplaces and dry flooring and 95% coverage in exterior and wet areas – like showers and bath surrounds. When learning how to tile, it’s also crucial to keep in mind that you should use a tile trowel to comb the adhesive in straight lines.
Applying the ridges in straight lines makes it easier for the adhesive to collapse while your tile is being laid. A stronger binding between the tile and adhesive is ensured by removing more air from the glue.
Step #6: Install The Ceramic Tile
Make careful to “back-butter” your tile using an adhesive when it comes time to set it down. Back buttering is a really good way to strengthen the binding between the mortar on your tile and the mortar on the floor.
This also guarantees a stronger adhesion to the tile and substrate, especially when working with big format tiles.
Tools Required For Tiling: Guide To Tile Installation
The time required to finish a project can be reduced by selecting the appropriate tiling tools. The materials won’t harm the tools, and neither will you. Using the proper tile installation tools and tips ensures a smoother and more precise job.
Adhesive
Selecting the right adhesive for the tile you plan to use for your project is crucial. The type of substrate you’re tiling upon and the tile’s size and type have a significant role in deciding which adhesive is ideal.
Electric Mixer
A strong bond as well as an overall long-lasting installation can be achieved by properly mixing the adhesive with an electric mixer to a good consistency.
Leveling Systems
Devices called leveling systems are utilized during tile installation to help eliminate variations in tile lippage and level that may occur between two or more tiles.
Protective Equipment
A barrier of defense against cuts and abrasions can be achieved by wearing protective gloves. Moreover, it offers additional traction when working with tiles, hence reducing the likelihood of accidents. You may protect your eyes from potential damage by using eye protection, such as safety glasses.
If you work on a lot of flooring, you can also think about getting an ergonomic seat for more comfort and better positioning when tiling.
Trowel And Spatula
The size and type of tile you’re laying must be taken into account when choosing the trowel size.
A u-notched trowel or a square-notched trowel are the two main trowels to consider while making this choice.
Suction Cups For Installing Tiles
Heavy tiles with a smooth or rough finish can be lifted and placed more easily thanks to suction cups, which are made especially for material handling and loading.
Conclusion
There are numerous methods for installing tile flooring. However, the guide to tile installation given above serves as a general step. When it comes to tiling a floor, always adhere to the manufacturer’s instructions and any applicable building codes.
The installation of a tile floor will take many days. You won’t be able to walk on the floor right away since it takes time for everything to dry, along with removing any old flooring and laying the tile.