How to Keep Every Tile Surface Looking Brand New
Tile is one of the most durable, beautiful, and long-lasting materials you can install in your home, but only if you take care of it properly. Over the years, I’ve seen stunning installations slowly lose their luster, and the number one cause isn’t poor craftsmanship. It’s poor maintenance.
The good news? Proper tile maintenance doesn’t have to be complicated or time-consuming. With the right routine, you can preserve the beauty, durability, and value of every tile surface in your home, from your shower walls to your outdoor patio.
In this guide, I’m going to walk you through everything you need to know about maintaining every type of tile in your home. Whether your tile was installed last month or ten years ago, this guide will help you protect your investment and keep it looking stunning for decades to come.
Why Regular Tile Maintenance Matters More Than You Think

Most homeowners assume tile is basically maintenance-free. I understand why. Tile is tough, water-resistant, and built to last. But durability doesn’t mean invincibility.
Here’s what surprises a lot of people: it’s usually not the tile itself that causes problems. It’s the grout, the sealer, and the buildup that accumulates over time.
When maintenance slips, here’s what typically happens:
- Grout darkens and stains from moisture, soap scum, and daily grime
- Unsealed tile absorbs liquids, leading to permanent staining
- Cracked or deteriorating grout allows moisture behind walls, causing water damage
- Efflorescence and mineral deposits build up on outdoor tile and shower surfaces
- Mold and mildew take hold in grout lines, creating health and aesthetic problems
Regular care keeps all of these problems at bay, and it protects the value of your home at the same time.
How to Clean Different Types of Tile the Right Way
Not all tile is created equal, and cleaning methods that work perfectly for one type can actually damage another. This is one of the most important things I share with homeowners after completing an installation.
| Tile Type | Best Cleaning Approach | What to Avoid |
|---|---|---|
| Glazed ceramic and porcelain | pH-neutral cleaner or warm water with a few drops of dish soap | Bleach, ammonia, abrasive scrub pads |
| Natural stone (marble, travertine, slate, limestone) | Stone-specific pH-neutral cleaner, wipe spills immediately | Vinegar, lemon juice, any acidic cleaner |
| Glass tile | Streak-free glass cleaner or mild soap solution | Abrasive powders and scrubbing pads |
| Unglazed ceramic, terracotta, cement | Mild cleaner on a sealed surface only | Acidic cleaners, heavy water saturation |
| Grout (all types) | Soft-bristle grout brush with baking soda paste or oxygen bleach | Wire brushes, chlorine bleach, regular vinegar use |
Maintaining Tile in Every Area of Your Home

Different areas of your home present different maintenance challenges. Here’s how I approach each one.
Bathroom Wall and Shower Tile
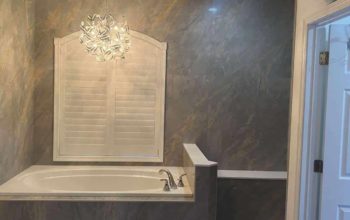
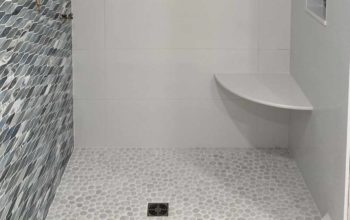
Of all the tile surfaces in a home, shower tile faces the harshest conditions. It’s exposed to constant moisture, temperature changes, body oils, and soap every single day. Bathroom walls take a similar beating from steam and humidity.
My go-to recommendation is a daily squeegee after every shower. It takes about 30 seconds and dramatically reduces water spots, soap film, and mineral buildup between cleanings. Ventilation is your second line of defense: run your exhaust fan during and for at least 15 to 20 minutes after every shower.
For weekly cleaning, use a pH-neutral or non-abrasive tile cleaner. Never use steel wool or abrasive scrub pads. They scratch the tile glaze and create tiny grooves where mold and bacteria can hide.
Re-caulk around the tub and shower surround as needed. Cracked or missing caulk is one of the most common causes of water damage behind walls.
Kitchen Backsplash Tile
Kitchen backsplashes deal with a completely different enemy: grease. Cooking splatter, oil mist, and food residue build up fast, especially around the stove.
The key here is frequency. Grease that’s wiped away immediately is easy to remove. Grease that’s been baked on by heat and left for days becomes a stubborn problem.
Wipe down your backsplash after every cooking session with a damp microfiber cloth, then use a degreasing cleaner weekly to cut through any buildup on both the tile and grout. Pay close attention to grout lines near the stove, which is where grease penetrates deepest and stains permanently if left untreated. A soft-bristled toothbrush dipped in baking soda paste works well for targeted scrubbing without harsh chemicals.
Floor Tile
Floor tile endures more wear than any other tile surface in your home. Foot traffic, furniture, dropped items, pet nails, and tracked-in dirt all take a toll over time.
The key is preventing dirt from becoming abrasive grit that scratches the surface, and keeping the grout clean so it doesn’t permanently stain. Small particles act like sandpaper underfoot.
The most common floor tile mistake I see is homeowners using too much water when mopping. Excess water seeps into grout joints and, over time, weakens the grout or causes issues with the substrate beneath. Wring your mop out well and keep it just damp, not soaking.
One more thing worth knowing: steam mops might feel like a great deep-cleaning tool, but they can soften grout and sealant over time. I recommend sticking to traditional damp mopping.
Simple habits that protect floor tile long-term:
- Place doormats at all entry points to reduce tracked-in dirt and grit
- Sweep or dry mop daily in high-traffic areas
- Use felt pads under furniture legs to prevent cracking and scratches
- Avoid dragging heavy objects and appliances across tile floors
Fireplace Tile
Fireplace tile is a stunning design feature, but it’s exposed to heat, soot, and ash, which creates a very specific cleaning challenge. Always wait until the fireplace is completely cool before doing any cleaning.
Here’s the process I recommend:
- Remove loose ash and debris with a soft, dry brush before applying any liquid cleaner
- Apply a mild dish soap and warm water solution, or a fireplace-specific tile cleaner for heavier buildup, and let it sit for a few minutes
- Scrub gently with a non-abrasive brush and wipe clean with a damp cloth
- Dry thoroughly to prevent moisture from seeping into the grout
Avoid abrasive scrubbers on fireplace tile. Scratches trap soot and make future cleaning even harder. For natural stone surrounds, stick to stone-safe products, since heat can make stone more porous over time and cause it to absorb cleaning chemicals more readily. Also make sure any sealing product you use is rated for high heat, and always check the label before applying anything near a firebox.
Outdoor Tile
Outdoor tile faces the toughest conditions of all: UV exposure, rain, temperature swings, freeze-thaw cycles, algae growth, and general outdoor grime.
Sweep regularly to prevent leaves and organic debris from breaking down and staining the surface. For deeper cleaning, use a tile and grout cleaner designed for outdoor use with a stiff nylon brush. A pressure washer on a low setting works well, but keep the pressure moderate, because too much force can blast grout out of the joints and damage tile edges.
Efflorescence, the white powdery deposit you sometimes see on outdoor tile, is caused by water moving through the tile and depositing mineral salts on the surface. It’s especially common in new installations or after heavy rain. A specialized cleaner usually removes it, but recurring efflorescence may point to a water management problem beneath the surface that needs professional attention.
Sealing matters more outdoors than anywhere else. Reseal outdoor grout at least once a year, and more often in areas with heavy rainfall or extreme temperature swings.
Grout Care: The Most Overlooked Part of Tile Maintenance

I’ll be honest: grout doesn’t get enough respect. Most homeowners focus entirely on the tile itself, but grout is what holds the whole installation together and keeps moisture out where it doesn’t belong.
Grout is porous by nature, which means it absorbs everything: moisture, dirt, oils, and cleaning residue. Clean, bright grout makes tile look fresh and polished. Stained, cracked, or discolored grout makes even beautiful tile look old and neglected.
How to Clean Grout the Right Way
For routine cleaning, a paste of baking soda and water applied with a soft or stiff-bristle grout brush is one of the most effective and gentle options available. Scrub along the grout lines in a circular motion, then rinse with clean water.
For heavier staining, oxygen bleach products work well on white and light-colored grout without the harsh effects of chlorine bleach. Avoid chlorine bleach for regular cleaning, since frequent use breaks grout down over time and makes it more porous. Never use bleach on colored grout, as it can fade the color permanently. And never use a wire brush, which tears grout out and creates more problems than you started with.
Vinegar works in a pinch, but the acid slowly erodes grout when used as a primary cleaner. Keep it out of your regular routine.
When Grout Needs to Be Replaced, Not Just Cleaned
No amount of cleaning will fix grout that is cracked, crumbling, or has been penetrated by moisture. Inspect your grout at least twice a year and look for:
- Cracks or gaps in grout lines, especially in wet areas
- Crumbling or deteriorating grout that comes away when touched
- Persistent dark staining that doesn’t respond to cleaning
- Grout pulling away from tile edges or corners
- Grout that feels soft when you press on it
Even with great maintenance, grout doesn’t last forever. In high-use showers, grout often starts to crack or crumble after 8 to 10 years, especially if it was never sealed properly. When grout reaches that stage, it needs to be removed and replaced, a process called regrouting. Doing it early is always more cost-effective than letting the damage spread to the substrate.
Sealing Your Tile and Grout: What You Need to Know

Sealing is one of the most effective things you can do to protect your tile installation, and it’s one of the most misunderstood. I can’t count how many times I’ve been called in to address staining that could have been prevented entirely with a simple sealer application.
Does All Tile Need to Be Sealed?
Not all tile needs sealing, but almost all grout does.
| Tile Type | Needs Sealing? |
|---|---|
| Glazed ceramic | No, but the grout does |
| Glazed porcelain | Usually no, but the grout does |
| Glass tile | No, but the grout does |
| Natural stone (marble, travertine, slate, limestone, granite) | Yes, tile and grout |
| Unglazed ceramic and porcelain | Yes |
| Terracotta and cement tile | Yes |
How Often Should You Seal?
As a general guideline, grout should be resealed every one to two years in high-traffic and high-moisture areas. Showers may benefit from sealing every six months. Natural stone should be resealed annually, or more often in wet areas. Outdoor tile and grout should be resealed at least once a year.
Here’s a simple test I show every homeowner: sprinkle a few drops of water on the tile or grout. If the water beads up, your sealer is still doing its job. If it soaks in within a minute or two, it’s time to reseal.
How to Apply Sealer Yourself
Sealing is one of the more manageable DIY tile maintenance tasks. Here’s the basic process:
- Clean the tile and grout thoroughly and let it dry completely, at least 24 to 48 hours. Any residue left behind will be sealed in permanently.
- Apply sealer with a small foam applicator, brush, or applicator bottle, working in small sections.
- Allow the sealer to penetrate for the time specified on the product label.
- Wipe away any excess sealer before it dries on the tile face.
- Allow full curing time before exposing the area to water or foot traffic.
For natural stone, use a penetrating stone sealer applied with a clean cloth or sponge, following the manufacturer’s directions carefully.
Preventing Stains and Damage Before They Start

The best tile maintenance is the kind that prevents problems in the first place. In my experience, a little prevention saves a lot of restoration work down the road.
- Address spills immediately, especially on natural stone or unsealed tile
- Keep grout sealed to prevent staining and moisture infiltration
- Use mats and rugs at entryways, and felt pads under furniture legs
- Fix leaky faucets and plumbing fixtures promptly, since persistent water exposure breaks down grout and caulk fast
- Replace caulk in corners and transitions before it cracks, molds, or pulls away
- Run the bathroom exhaust fan during and after every shower
- Don’t leave wet towels or bath mats sitting on tile floors
- Keep a supply of matching tile and grout on hand after any installation, because finding an exact match years later is very difficult
What Cleaners to Avoid
Using the wrong products is one of the most common causes of tile and grout damage I see on service calls. Keep these away from your tile:
- Vinegar and other acidic cleaners, which damage natural stone and erode grout
- Chlorine bleach used regularly, which strips sealant and weakens grout
- Abrasive scrubbing powders and pads, which scratch tile surfaces and glaze
- Oil-based cleaners, which leave residue that attracts dirt
- Steam cleaners used frequently, which can soften grout and sealant
When to Call a Professional

There are plenty of maintenance tasks homeowners can handle on their own, and then there are situations where a good cleaning routine simply won’t cut it. Knowing the difference can save you from a much larger repair bill.
Watch for these warning signs:
- Hollow-sounding tiles. Tap tiles lightly. A hollow sound means the bond beneath has failed.
- Persistent mold or mildew that returns after cleaning. This usually means moisture is trapped underneath.
- Cracked, crumbling, or missing grout, especially in showers and wet areas. Failed shower grout is a waterproofing emergency.
- Tiles that have shifted, lifted, cracked, or feel loose. This often points to substrate movement or adhesive failure.
- Water stains on walls or ceilings adjacent to tiled wet areas.
- Staining that doesn’t respond to cleaning, or grout that re-stains immediately after being cleaned.
A professional maintenance visit typically includes deep cleaning, grout sealing, grout repair or replacement, caulk inspection and replacement, and an assessment of any structural concerns. Professional-grade steam equipment and commercial sealants produce results that are genuinely difficult to replicate with consumer products, especially on older or heavily stained installations.
I’ve transformed bathrooms and kitchens that homeowners were ready to completely retile, simply by professionally cleaning and resealing the grout and replacing a handful of damaged tiles. Catching problems early is almost always cheaper and less disruptive than waiting.
How Regular Maintenance Preserves Your Home’s Value

Well-maintained tile doesn’t just look better, it’s genuinely worth more. Tile floors, shower surrounds, and backsplashes are major selling points, and buyers notice immediately when tile looks outdated, stained, or damaged. Homes with clean, well-maintained tile photograph better, show better, and command better offers.
Beyond resale value, maintaining your tile properly extends its lifespan dramatically. A properly installed and maintained tile floor can last 50 years or more. Neglect the maintenance, and you may be looking at a full replacement in 10 to 15 years, a significant and completely avoidable expense.
Your Simple Tile Maintenance Schedule
Staying consistent is the key to keeping tile looking great long-term. Here’s the quick-reference schedule I share with every homeowner:
| Frequency | What to Do |
|---|---|
| Daily | Squeegee shower walls after use; sweep or dry mop high-traffic floors; wipe up spills immediately |
| Weekly | Clean shower and bathroom tile with a pH-neutral cleaner; wipe down kitchen backsplash; damp mop tile floors |
| Monthly | Scrub grout lines in high-use areas; inspect caulk and grout in wet areas for early wear |
| Every 6 Months | Inspect all tile installations for damage; run the water bead test on sealer; clean fireplace tile if used regularly; consider resealing shower grout |
| Annually | Reseal grout in wet areas and high-traffic floors; reseal natural stone; reseal all outdoor tile and pavers before winter; re-caulk wet area joints as needed |
Protect Your Tile Investment With the Right Team Behind You
Tile maintenance is one of the most straightforward ways to protect the value and beauty of your home — and most of it comes down to consistent, simple habits. From shower tile and kitchen backsplashes to outdoor pavers and fireplace surrounds, every tile surface benefits from the right care routine.
At Tile Mechanics Corp, we’ve been serving homeowners across the Delmarva Peninsula with professional tile installation, maintenance, and restoration services. I know how much thought and investment goes into a quality tile installation, and I’m passionate about helping homeowners get the most out of every surface we work on.
Whether you’re dealing with stubborn grout staining, need a professional re-seal, or want a consultation on restoring an older tile installation, our team is ready to help. We understand the unique environmental conditions here on Delmarva and bring that local expertise to every job.
Ready to protect your tile investment? Contact Tile Mechanics Corp today to schedule a consultation or request a quote. We’ll assess your tile surfaces and give you a clear, honest recommendation — so your tile stays beautiful for years to come.